sábado, 4 de septiembre de 2010

Mapa Radar Linux

Cuando ponemos un applet metereologico en la barra tareas, si en sus preferencias activamos el mapa de radar no veremos la imagen anoser que le pongamos la direccion.


Para solucionar esto iremos a esta pagina :

http://www.sat24.com/

  • Seleccionas tu zona en los enlaces de la izquierda y verás que aparece la imagen en movimiento
  • Haz clic con el botón derecho en la imagen y selecciona la opcion "Copiar la ruta de la imagen"
  • Pega en la caja de texto "Direcciones" de la pestaña "General" de las preferencias del applet del tiempo teniendo marcado activar mapa de radar y usar direccion personalizada.
  • Ya tenemos el mapa de radar funcionando.
Salut2

viernes, 3 de septiembre de 2010

jueves, 2 de septiembre de 2010

ArchLinux

En estos dias he estado instalando Arch Linux en mi ordenador de mesa, pues la verdad estaba ya un poco cansado de ubuntu, y decidi probar otra distro, pense en volver a debian pero seguro que me iva a encontrar con los mismos problemas de siempre, y esque debian avanza lento.

http://www.debian.org/index.es.html

Me puse a leer por la www y decidi probar Arch Linux.

http://www.archlinux.org/

La instalacion es similar a debian, todo en modo grafico, y solo instala el sistema base, sin gestor de ventanas, el cual se instala despues junto a los drivers que necesite el PC.
Asi solo instalamos justo lo que necesita nuestro sistema.

No conocia pacman ni sus comandos, pero la verdad que no me ha costado nada adaptarme a el pues es mas facil aun que apt, comandos mas cortos y es super rapido, diria que mas que apt.

-----------------------------------------------------
[satyriko@asus-p5n ~]$ pacman -h --help
uso: pacman [...]
operaciones:
pacman {-h --help}
pacman {-V --version}
pacman {-D --database}
pacman {-Q --query} [opciones] [paquete(s)]
pacman {-R --remove} [opciones]
pacman {-S --sync} [opciones] [paquete(s)]
pacman {-U --upgrade} [opciones]
-----------------------------------------------------

Con respecto a los paquetes y programas, estan practicamente los mismos que para Ubuntu u otra distribucion linux, y tambien AUR donde los usuarios crean paquetes adaptados a Arch y se instalan con makepkg,

-----------------------------------------------------
[satyriko@asus-p5n ~]$ makepkg -h
makepkg (pacman) 3.4.0

Uso: /usr/bin/makepkg [opciones]

Opciones:
-A, --ignorearch Ignorar campo arch incompleto en PKGBUILD
-c, --clean Limpiar archivos tras la compilación
-C, --cleancache Limpiar las fuentes de la cache
-d, --nodeps salta la verificación de dependencias
-e, --noextract No extraer los fuentes (usar el directorio src/)
-f, --force Sobreescribe el paquete existente
-g, --geninteg Generar verificaciones de integridad para los fuentes
-h, --help Esta ayuda
-i, --install Instalar el paquete tras una compilación exitosa
-L, --log Registra el proceso de construcción
-m, --nocolor Deshabilitar los colores en la salida
-o, --nobuild Sólo descargar y extraer
-p Usar un script alternativo (en vez de 'PKGBUILD')
-r, --rmdeps Elimina las dependencias instaladas tras una creación exitosa.
-R, --repackage Vuelve a crear el paquete sin recompilar
-s, --syncdeps Instala las dependencias que faltan con Pacman
--allsource Genera un archivo sólo con los fuentes, incluyendo los fuentes descargados
--asroot Permitir a makepkg ser ejecutado como el usuario administrador
--config Usa un archivo de configuración alternativo (en vez de '/etc/makepkg.conf')
--holdver Previene el choque automático de versiones para los PKGBUILD de desarrollo
--pkg Sólo construye los paquetes listados desde un paquete dividido
--skipinteg No falla cuando faltan las verificaciones de integridad
--source Genera un paquete de fuentes, sin incluir las fuentes descargadas

Estas opciones pueden ser pasadas a pacman:

--noconfirm No solicita confirmación alguna cuando se encuentra resolviendo dependencias
--noprogressbar No muestra la barra de progreso al descargar los archivos

Si no se especifica -p, makepkg buscará 'PKGBUILD'
-----------------------------------------------------

o yaourt similar a pacman pero con paquetes que no hay en pacman.

-----------------------------------------------------
[satyriko@asus-p5n ~]$ yaourt -h
Usage: yaourt [...]
operations:
yaourt (search pattern|package file)
yaourt {-h --help}
yaourt {-V --version}
yaourt {-Q --query} [options] [package(s)]
yaourt {-R --remove} [options] [package(s)]
yaourt {-S --sync} [options] [package(s)]
yaourt {-U --upgrade} [options] [package(s)]
yaourt {-C --clean} [options]
yaourt {-B --backup} (save directory|restore file)
yaourt {-G --getpkgbuild} package
yaourt {--stats}
-----------------------------------------------------
Estoy muy contento con el resultado, creo que tardare en volver a instalar ubuntu en mis maquinas despues de probar Arch.

Instale el escritorio Gnome que es el que mas me gusta desde que conozco linux y este es el resultado despues de tunearlo un poco.


-----------------------------------------------------
Salut2

sábado, 21 de agosto de 2010

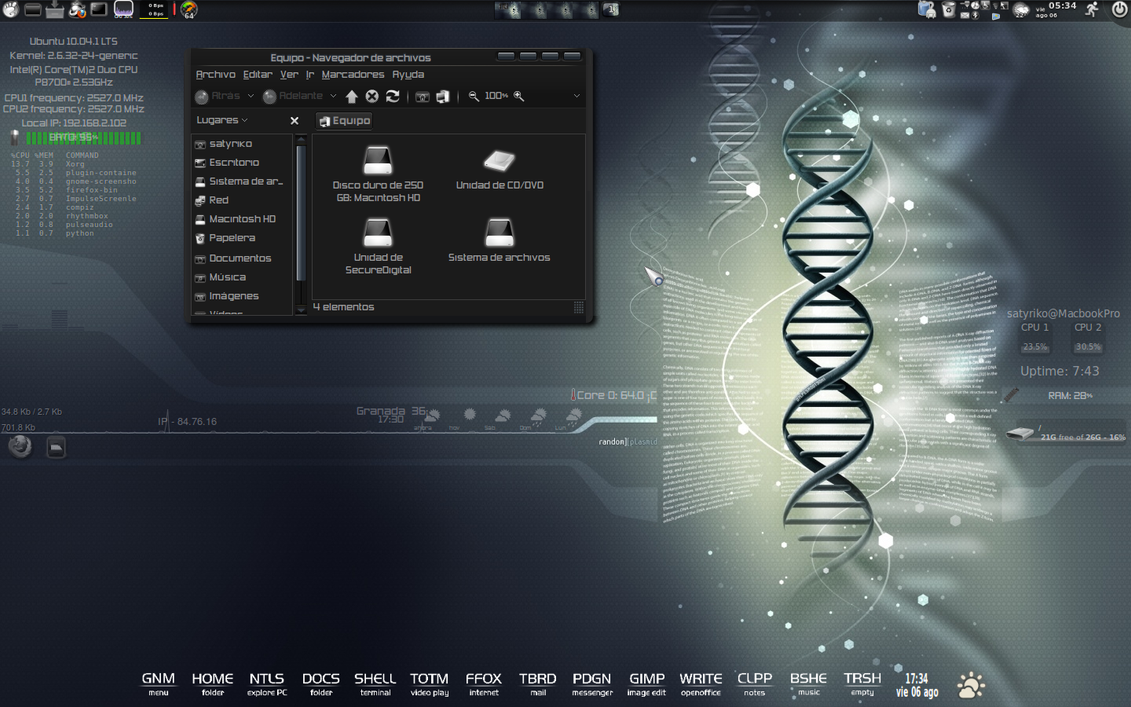
Ubuntu Lucid Themes

Hope you like.

Include wallpaper, gtk-2 theme, emerald theme and conky.

IMPORTANT:
the conky script is adapted to a 5.4 macbook pro unibody.
if you have a different computer you have to change conky commands and scripts used to,
that all information displayed on the screen is correct.

installation instructions inside the package.

Stairway to Heaven:


Download:
http://www.mediafire.com/file/mac8w6d6ux96jvs/Stairway_to_Heaven.tar.gz

System Monitoring Interface:


Download:
http://www.mediafire.com/file/0qvqymwzmt1gjgz/System_Monitoring.tar.gz

The Dark Purple:


Download:
http://www.mediafire.com/file/c6ul6rcux6bcprl/the_dark_purple.tar.gz


Ubuntu MacBook Pro Desktop:


Download:
http://www.mediafire.com/file/yb5x8mg8094exmv/Ubuntu%20MBP%20Desktop.tar.gz

sábado, 14 de agosto de 2010

How to compile a kernel on Ubuntu 10.04

How to compile a kernel on Ubuntu 10.04

Fuente: http://linuxtweaking.blogspot.com/2010/05/how-to-compile-kernel-on-ubuntu-1004.html

The Ubuntu wiki does provide the necessary documentation to allow users to build their own Linux kernel but in a rather disorganised way.

They should restructure it and provide clear detailed steps for each release and not the current mish-mash of old and new.

How about giving each release their own dedicated wiki page?

Original Ubuntu wiki: https://help.ubuntu.com/community/Kernel/Compile

First steps

Install the required tools and packages.

Open a terminal and type the following,

sudo apt-get install fakeroot kernel-wedge build-essential makedumpfile kernel-package libncurses5 libncurses5-dev

Then run the following command,

sudo apt-get build-dep --no-install-recommends linux-image-$(uname -r)

And finally type,

mkdir ~/src
cd ~/src
apt-get source linux-image-$(uname -r)
cd linux-2.6.32

At the time of writing 2.6.32 was the current kernel source, it should remain at this version throughout the life of Ubuntu 10.04

It is a good idea to start with the same .config as the currently running kernel, so type the following,

cp -vi /boot/config-`uname -r` .config

Now we are ready to customize the build and kernel options.

make menuconfig

Once you have finished, save and exit. It is now time to compile. However to speed up the build if you have a dual core processor type,

export CONCURRENCY_LEVEL=3

The general rule is 1 + the number of processor cores.

make-kpkg clean
fakeroot make-kpkg --initrd --append-to-version=-some-string-here kernel-image kernel-headers

Remember to substitute the writing in green for something else, for example -alpha

After a few minutes or hours your kernel compile will be complete. The next step is to install it.

The kernel package will be created in the parent directory of ~/src/linux-2.6.32 (i.e. ~/src)

cd ~/src
sudo dpkg -i linux-image-2.6.32.11+drm33.2-alpha_2.6.32.11+drm33.2-alpha-10.00.Custom_amd64.deb
sudo dpkg -i linux-headers-2.6.32.11+drm33.2-alpha_2.6.32.11+drm33.2-alpha-10.00.Custom_amd64.deb

Please note the text in green must be changed to reflect your version.

We are almost ready, prior to 10.04 the initramfs kernel image was automatically created. The Ubuntu wiki suggests using the scripts to create the image but I have been unsuccessful in using this method, hence the manual approach.

sudo update-initramfs -c -k all

BUG: Please use the alternate method described below as this command fails to create an image for your new kernel. Special thanks to Helios38. - 16/06/2010


Alternatively if you know the kernel version, substitute the word all with the kernel version.

Example, sudo update-initramfs -c -k 2.6.32.11+drm33.2-alpha

Finally we need to add the initramfs image to the grub.cfg file located at /boot/grub/grub.cfg.

For the easy and automatic method as oppose to manually editing the grub.cfg file, just type the following,

sudo update-grub

Now just reboot and your new kernel should automatically load.

How to remove your kernel

sudo dpkg -r linux-headers-2.6.32.11+drm33.2-alpha
sudo dpkg -r linux-image-2.6.32.11+drm33.2-alpha
sudo rm /boot/initrd.img-2.6.32.11+drm33.2-alpha

Enjoy compiling your own kernels.

domingo, 18 de julio de 2010

Foxy Proxy para Firefox


La extensión FoxyProxy para Firefox. Para ello iremos a la página y lo instalaremos, una vez instalado, reiniciaremos el navegador. Nos aparecerá abajo a la derecha un cartelito rojo indicando que FoxyProxy está deshabilitado. Para habilitarlo es tan sencillo como hacer click con el botón secundario y escoger opciones. En la pantalla escogeremos, añadir nuevo proxy y añadiremos los datos de una lista de proxys. Pondremos un nombre, la descripción del país y en la pestaña detalles pondremos la IP y el puerto. El socket es v5. Aceptaremos, y en la barra de estado, donde hicimos antes click con el botón secundario lo volveremos a hacer y escogeremos nuestra proxy.
Este sistema se puede utilizar también para saltarse las limitaciones de megavideo, megaupload etc... y las restricciones de streaming de vídeo sólo disponibles para ciertos países.